


If you’ve been dreaming about the timeless beauty of Plantation Shutters but had always thought they were out of your budget, think again! At Tuiss, we have a great range of DIY shutter options that bring shutters back into the realm of possibility. From full frame traditional shutters, through to fixed shutters and frameless Easi-Fit shutters, we have a style that will be perfectly suited for your home. That being said, if you’re looking for the most affordable option in our range, it is without a doubt our flat-pack Kit Shutters.
The kit shutters are more affordable than the others, simply because there’s a bit more assembly work involved for you. While the other styles on our site have the panels fully assembled when they are delivered to your door, the kit shutters requires you to put them together. It’s a simple process, but we wanted to give you a comprehensive guide on how they go together, along with some tips that we found can make the installation process even smoother.
Are you ready to get started? Let’s go!

TIPS for before you begin:
- Take your time and make sure you read through everything first. Refer back to the instructions and this blog post as you’re going to make sure things are aligned and facing the right way. Don’t rush and things will go smoothly.
- We like to have snacks on hand if there are a few kit shutters to assemble! Snacks keep us happy!
Assembling the panels
This is the part that takes the longest, and the first panel you do will always take a bit more time while you’re figuring out how it all goes together. We promise you that the next panels will get put together much quicker!
Step 1
Unpack everything. Leave the stickers and protective film on the components at this stage to make it easy to identify the different parts and ensure the panels don’t get scratched during assembly.


Step 2
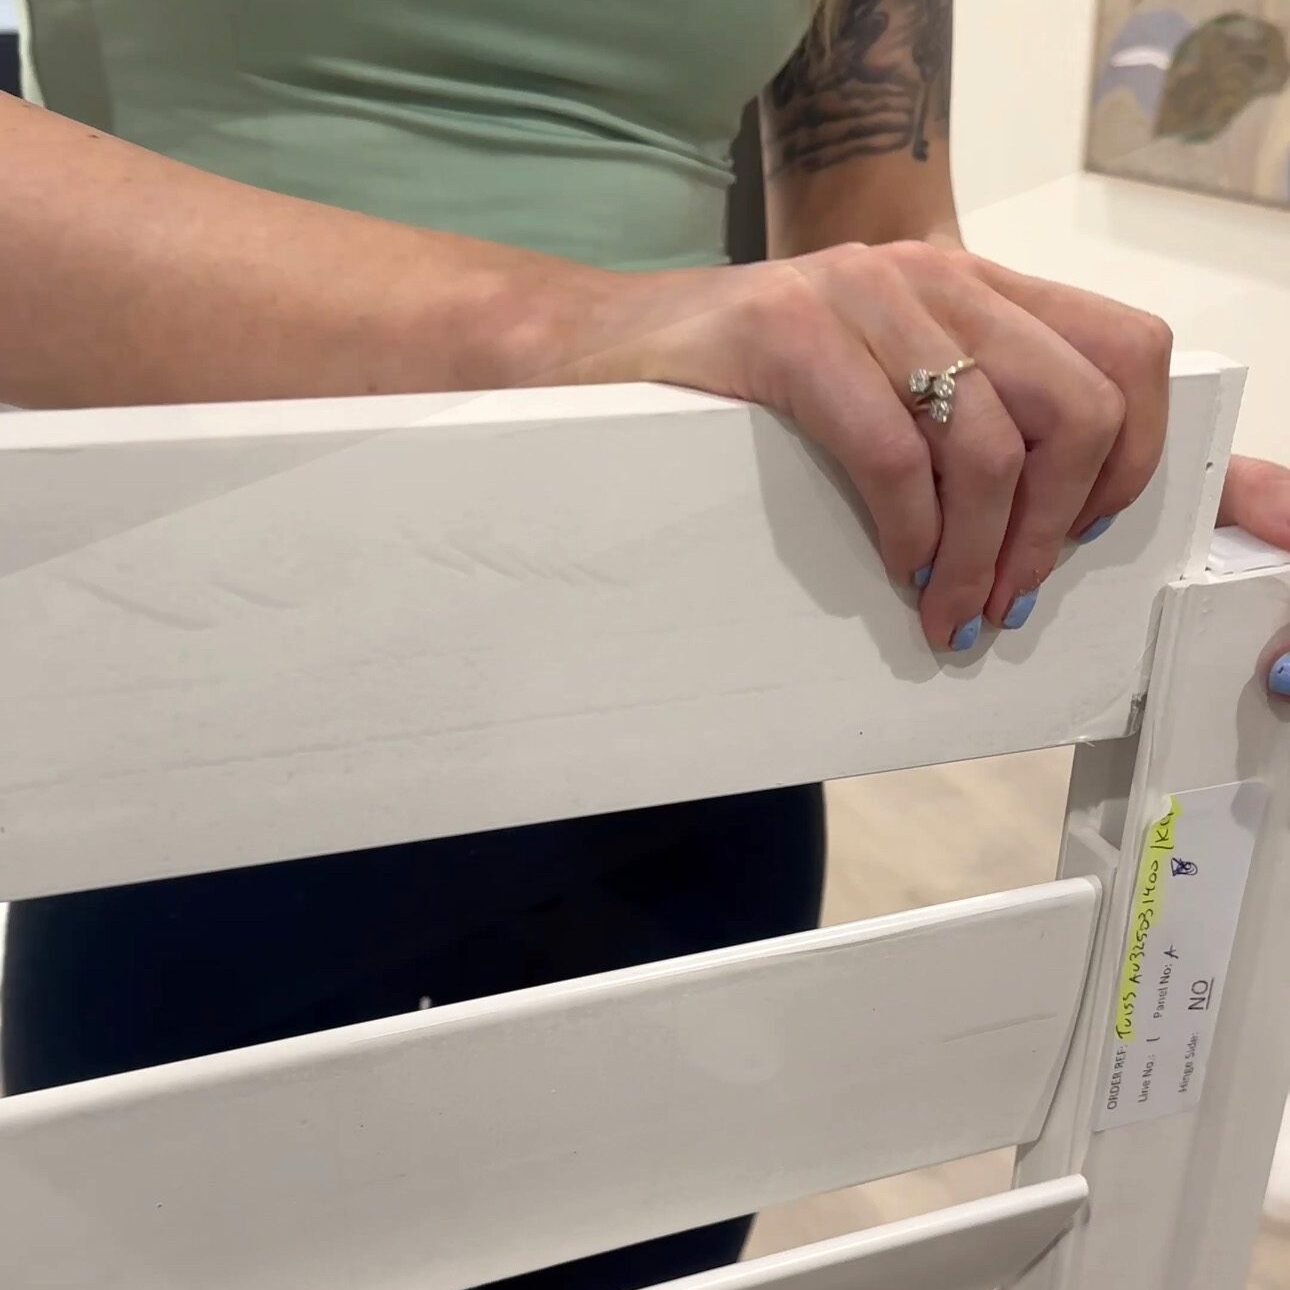
Look for the labels on your side rails. There will be hinged sides and non-hinged sides. The hinged sides of the panels are what attach to the brackets on the window frame.


Step 3
Make sure the pre-drilled holes on the hinged side rails are face down on the surface you’re working on for now. These holes are where your brackets will attach to when you’re fitting them to your windows.
- NOTE: You’re going to lay everything out in the way that they will be put together, face up. This will make the process infinitely easier, so you’re not having to search for pieces while you’re in the middle of assembling the panels. This will also ensure that you are familiar with all the components and get an understanding of how everything will go together.


Step 4
The top and bottom rails look identical, however when you’re installing them, one will be face up, and the other will be face down. The bottom rail should have the flat plane facing towards the front, and the top rail will need to have the recessed cutout facing the front. This will ensure that the louvres align and sit perfectly once assembly is completed.


Step 5
Ensure the individual louvres are laid out correctly. You’ll see that one corner of each louvre has a recessed cutout with a predrilled hole. These are to attach the hidden tilt bar later. When laying out the louvres, ensure that the cutout is facing the hinged side of the panel, and all facing towards the bottom. There’s nothing worse than slotting them all in and then realising a few have been put in the wrong way and don’t line up for the hidden tilt bar at the later stage. Laying them out this way now will make your life easier down the track.
- NOTE: When the louvres are aligned and assembled properly, they will overlap. The top of one louvre will hide the bottom of the one above it. Think about it in the way that when they’re up on your windows, you will pull the louvres downwards toward you to open them.


Step 6
The louvre pins should come already inserted into the louvres. If any have slid out of place, they are easy to slot back into the louvre. You’ll see a small round hole where the pin will insert.
Step 7
Keep the hidden tilt bar handy at the side of the louvres so you know where it is for later.
Now that everything is laid out and all the bits and pieces have been identified, it’s time to start putting everything together.
Step 8
Slot the bottom rail into the side rails (which are technically called stiles). Remember that the flat side will be facing up at the front of the panel.


Step 9
Insert two of the long screws into the hinge side, tight enough to keep it secure without any movement. Then insert one screw loosely on the other side, enough to hold this side rail in place while allowing movement.
- NOTE: Make sure there is some decent movement in the side with one screw to make slotting the louvres into place much easier. You should be able to lift it up and down, creating just enough space to slot the louvres in easily.
Step 10
Hold the panel on its side and align the louvre pins with the holes in the side rails. Have the side with the free movement on the top as you’re slotting in the louvres. You’ll want to hold it up loosely to allow each louvre to simply be held in place without locking down completely.
- NOTE: Holding the side with the movement up loosely the entire time will make it easier. Otherwise, if you’re locking it down into place each time, you need to lift the side rail for a new louvre and you might find that the previously inserted louvres slip out of place. This can happen as you are getting the hang of the technique. Remember, you’ll be an expert by the time you get to the next panel!


Step 11
Check that the louvres are all facing the correct way, with the cutout and predrilled corner hole all facing the same direction. Once all the louvres are slotted in and secure, tighten the screw on that moving side and insert the second screw in tightly.


Step 12
Now it’s time to slot the top rail into place. Remember to make sure that the recessed cutout is facing forward, the opposite way to your bottom rail. With this top rail, the flat plane is towards the back of the shutter panel. Be firm and gentle. Then screw into place.
- NOTE: We personally found it easiest to do with the panel standing up so you can use gravity to help you push the top rail down into place. Just be careful when standing your panel up and make sure you’re holding the sides tight, so the louvres don’t come out of place. If you have a larger panel though, this might not be the case so you may find it easier with it lying flat.


Step 13
It’s now time to attach the hidden tilt bar to your louvres. This allows the louvres to be angled altogether after the shutters are installed. Rest the panel on its side with the hinge side facing up. Align the louvres so you can see the small holes in the side. This is where the hidden tilt bar will attach. Line everything up, and screw into place.


Installing the brackets
Step 1
Before you do anything else here, work out which bracket is meant to go in which corner. This will make it easier when you’re installing as there are left and right brackets!


Step 2
Place the bracket in the corner, close to the front of your recess. Swing the hinge open to easily access the screw holes. Use two screws per hinge to fix into the recess.


Step 3
Each panel is supplied with 2 hinges. If your order contains only 1 panel, then install the hinges on the side you requested when ordering.
Step 4
If your order contains more than 2 panels, install the outer panels first. Then fit the hinges for the centre panel 3mm away from the edge of its neighbouring panel.
Installing the shutter panels and magnets
Step 1
Swing the hinges out from your brackets, so you have room to slide in the shutter panels. Before lifting your panel into place, you might like to remove the plastic film just from the hinge sides of your panel before screwing them in as it’s easier to remove before they’re screwed into place!


Step 2
Hold the shutter panels up against the hinges and screw them into place using 3 screws per hinge. This can be easier with two people.


Step 3
Once your panels are secured, it’s time to install the magnet plates. Use the centre point of your panels as a guide to line up your magnet. The magnet is what will hold your panels securely in place when your shutters are closed.
Step 4
Mark the screw hole positions, and then make the same marks on your magnet riser. You’ll want to pre-drill some holes in your magnet riser at this point.
Step 5
Use two screws to fix the magnet and riser to your window recess, one at the top and one at the bottom.
- NOTE: If you have anything at the bottom of your recess such as a window winder or protruding lock, then you will only need to install the magnet at the top of the recess.


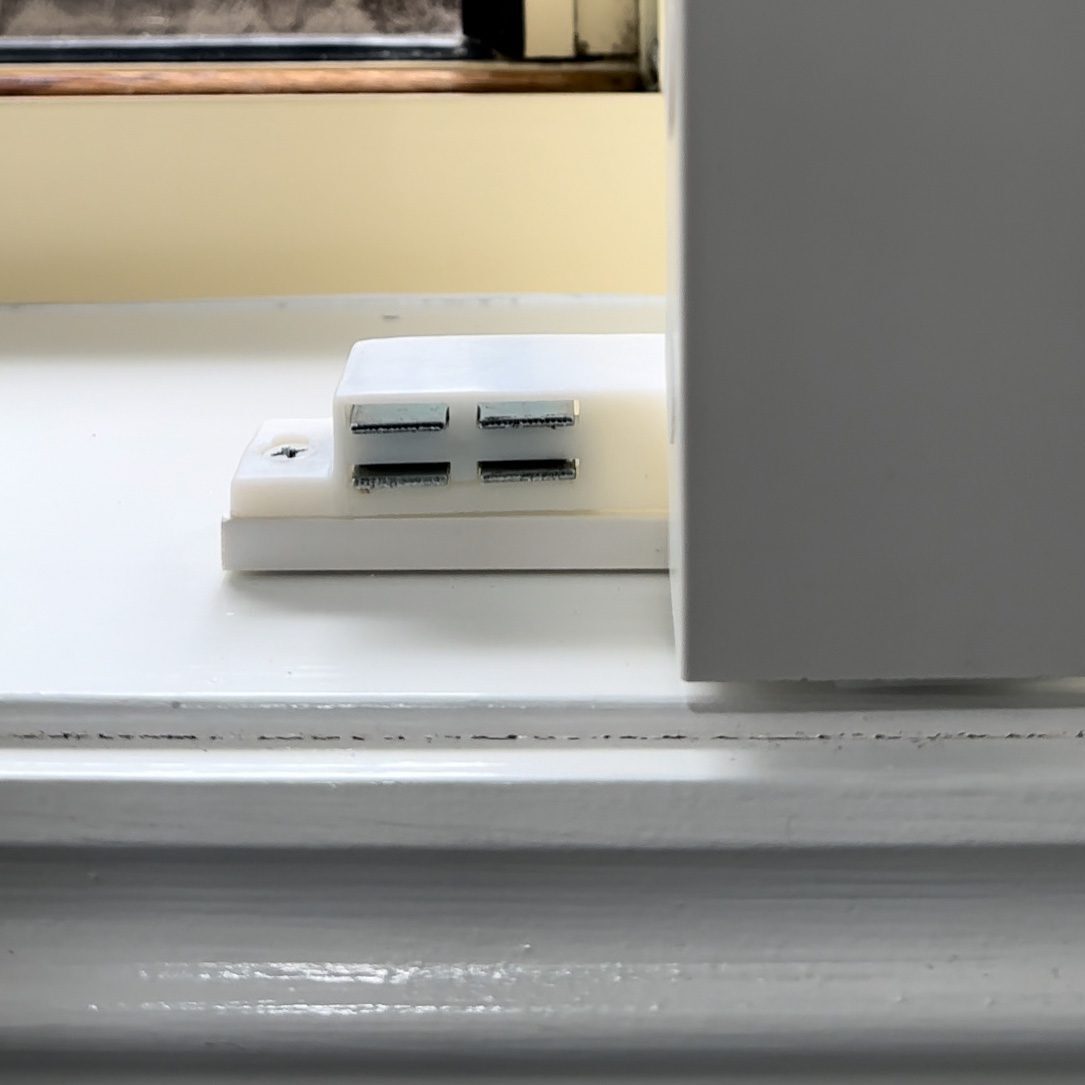
Step 6
Next, attach the metal strike plates to the back of the shutter panels, so that they’re in line with the magnets. Make sure you are using a flat top screw for this so it doesn’t get in the way and stop the magnet from connecting properly.


Step 7
The final step is to cover the screw holes in the side of your panels with the round stickers and remove the protective plastic film! Your kit shutters are assembled, installed and no doubt looking beautiful!


Step 8
Actually… the very final step is to celebrate and give yourself a pat on the back. Well done! You did it!

